 So, you’re thinking 2017 might be the year! You might actually take the plunge and start a blog. You have a friend that has a blog, or you follow a blog you love and you just have an itch to create your own unique space. Well, you are in luck! This post will break down how to start a blog this year in a few simple, easy steps. I started blogging in December of 2012 and never looked back. When I started this blog, I had been thinking and dreaming about it for about a year, but I was nervous and didn’t know where to start. Thankfully, I found a few posts that led me in the right direction, so I wanted to be sure to tell all of you in case there is even one of you out there waiting to start your passion.
Find Your Passion
Do you have kids and want to start a mom blog? Do you enjoy travel and want to talk about travel? Or, are you a fantastic cook and want to share your recipes with the world? Find your passion. This could be one thing, or even 3-5 things. You could want to start a lifestyle blog like Simply Clarke and talk about a variety of topics. Either way, define your passion. I have a passion statement for my blog that I revise every year, and a list of 3-5 topics I want to focus on for the year. This really helps me focus and bring consistency to my site.
Brainstorm Your Name
Now that you have narrowed down your passion, it is time to brainstorm a name. This can be one of the hardest decisions or easiest if you have thought about it for a long time. Pick a name that really speaks to you and embodies what you want your site to be about.
Check Your Name
You have name ideas? Now check them. You should check to see if your domain name is available and if you are wanting to change your social media usernames, you should check to make sure those are available as well. This is very important when coming up with a name. You don’t want to pick a name and then find out the URL isn’t available or that it is copyrighted somewhere.
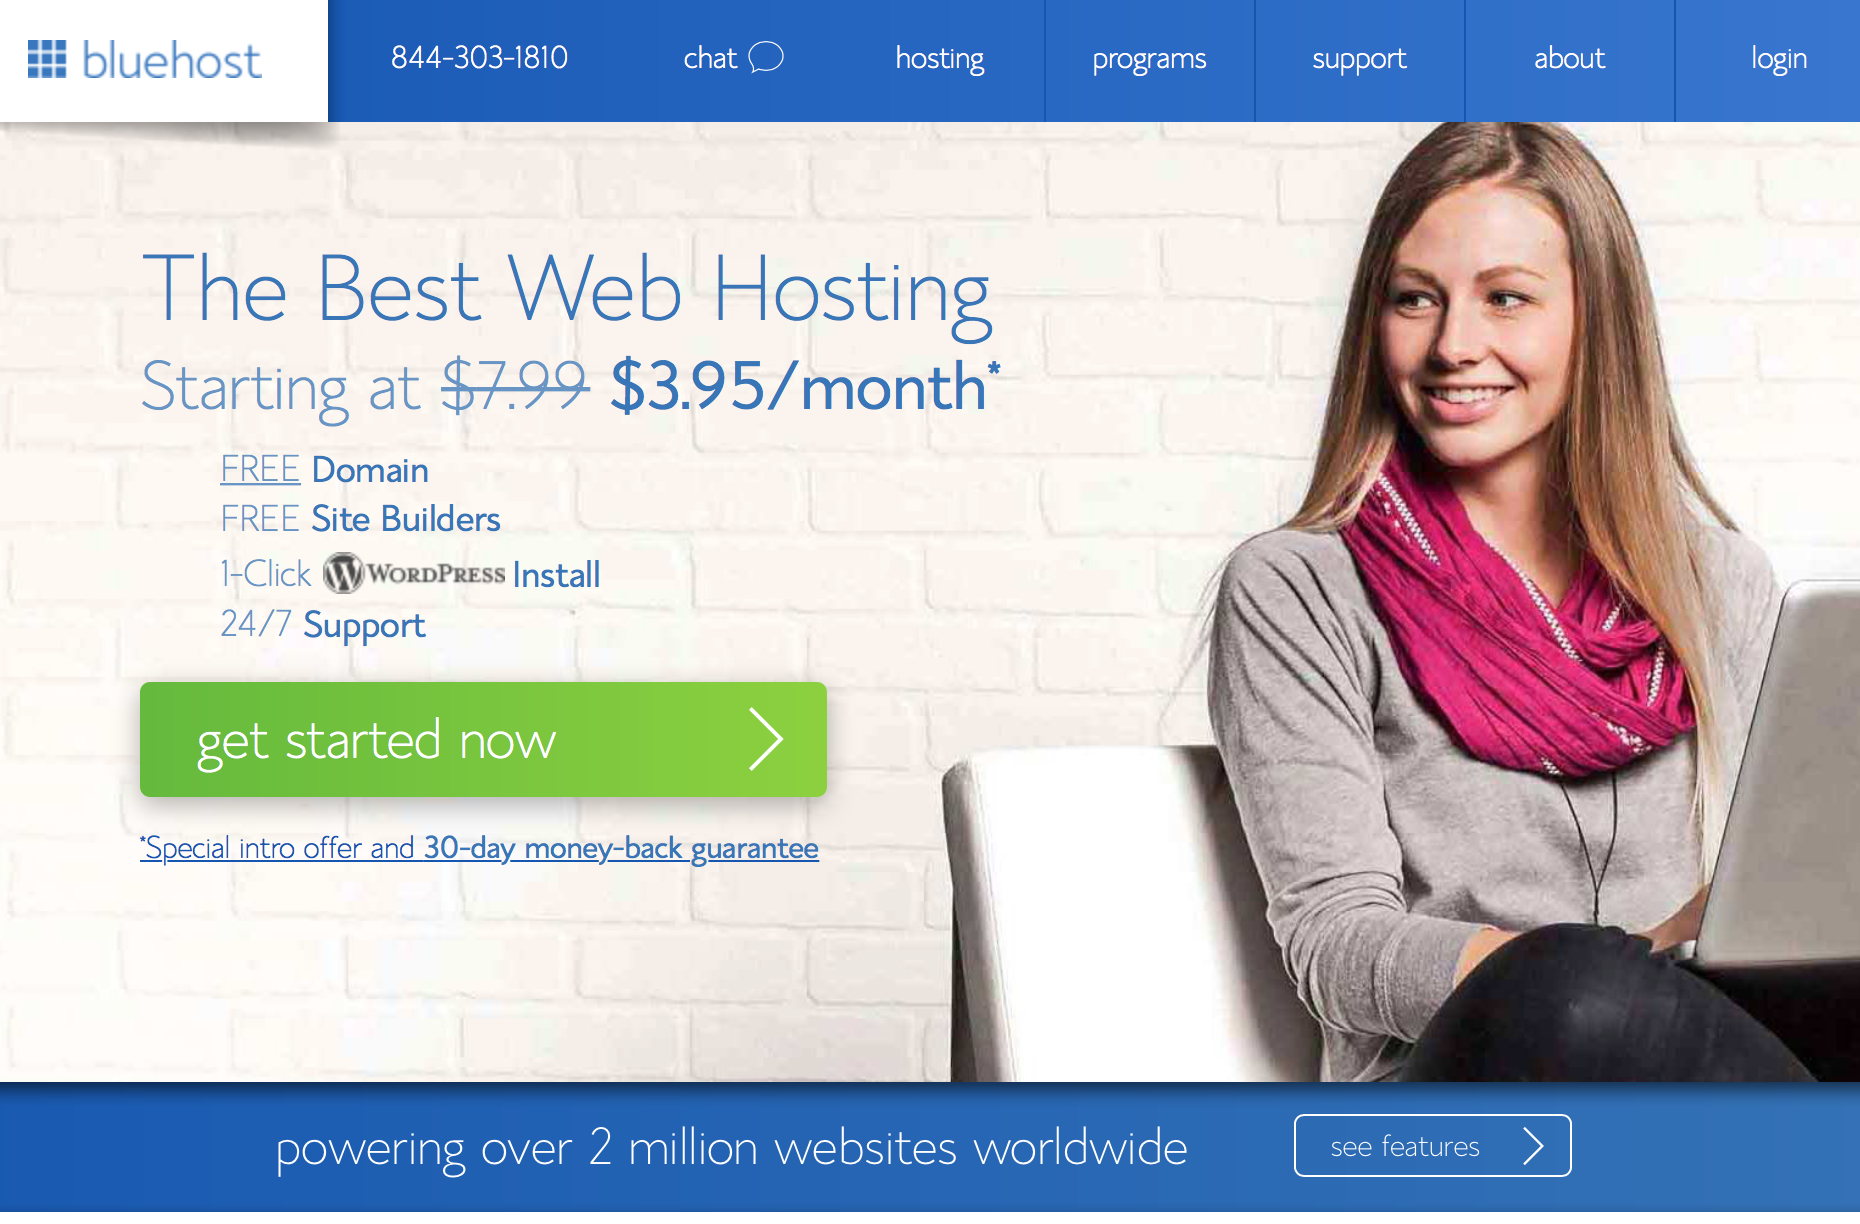
Once you have landed on a name, it is time to go to bluehost.com and click on get started now!
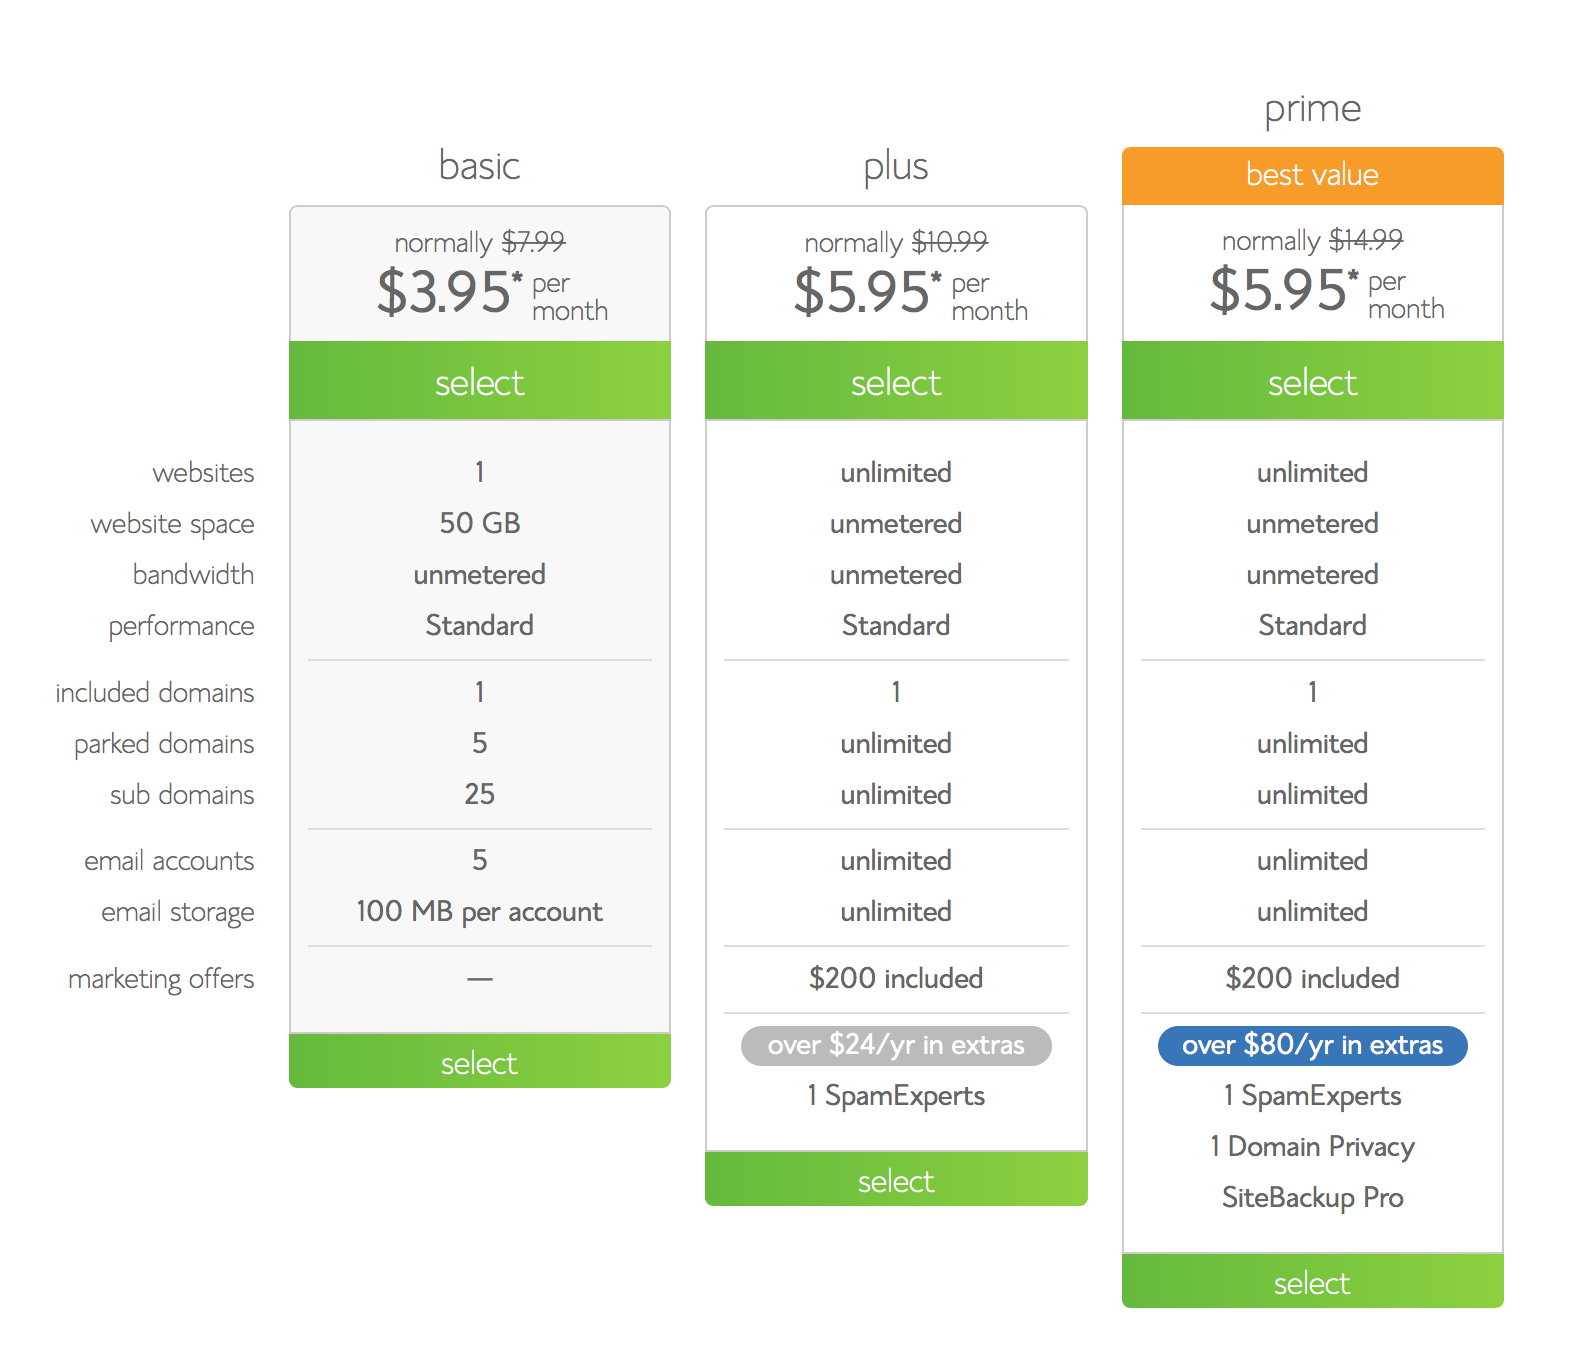
I recommend bluehost for hosting when you first start your blog, because it is user friendly and they have good prices. (Sidenote: Once you have built your following and have substantial page views, I suggest changing to a dedicated hosting company like Web Synthesis). The next screen will give you three account options, if you are just starting out, I would recommend the basic package.
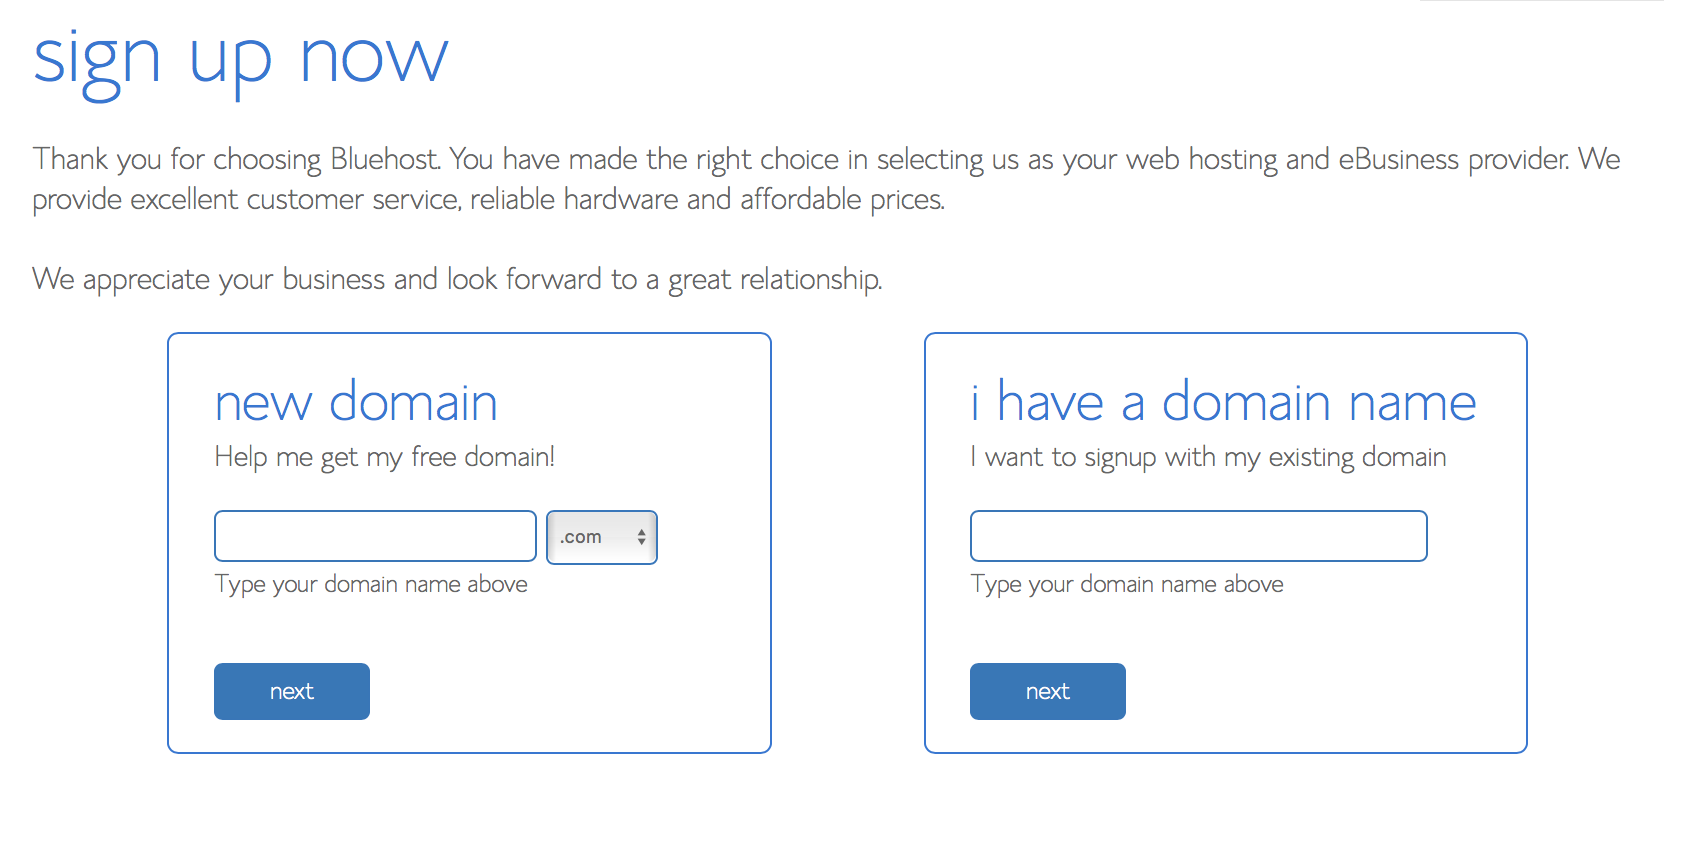
After this, you will be prompted to enter your domain name like we talked about earlier. Your domain name is free with your hosting account, however if you happen to already have one, you can enter it in the other option and bluehost will prompt you through how to use the one you already have.
 Buy Hosting
Next, it is time to actually purchase your hosting. Enter in your account information, and then it will start asking you about the package information shown below. Keep in mind that Bluehost gives you a monthly breakdown of the cost, however, they will bill you for the entire amount up front. I recommend that you purchase “site backup pro”. With this option, Bluehost saves a backup of your site occasionally in the event that something goes wrong. If you make a mistake on your site, install a bad plugin or accidentally erase your blog (these things happen), all you have to do is call them and they will restore your site back to normal! Trust me, you want this.
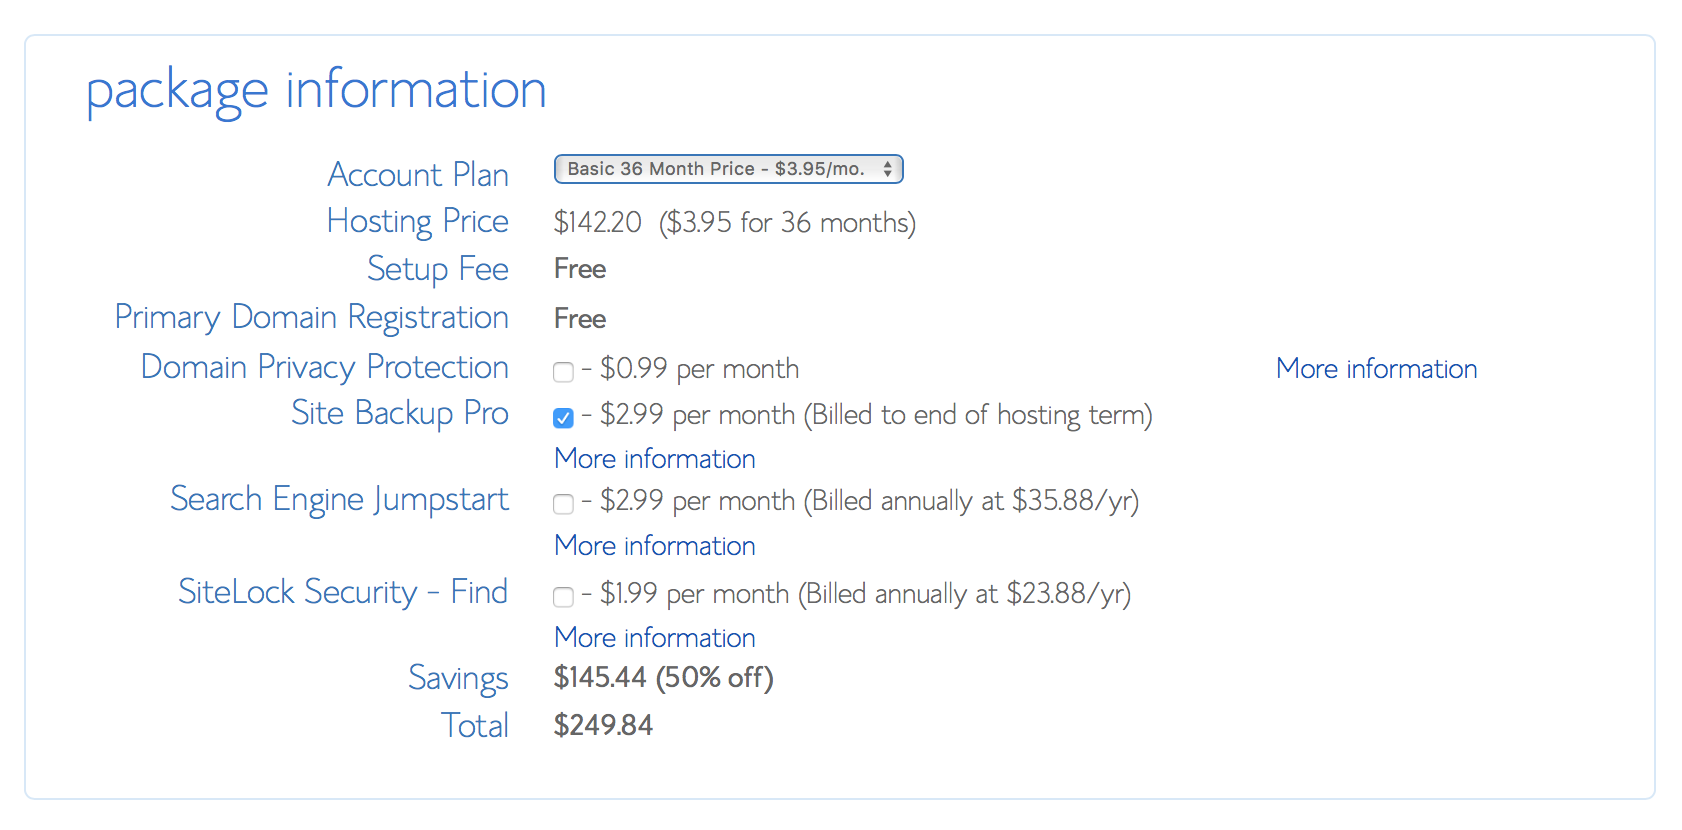 After you select your package options, all you have to do is enter your billing information and click “next”.
Install WordPress
Once your transaction goes through, you will receive an email confirmation that contains your username and password. Next, you will use this to sign into your account cpanel or homepage. Locate the “Install WordPress” option under the website section and click it.
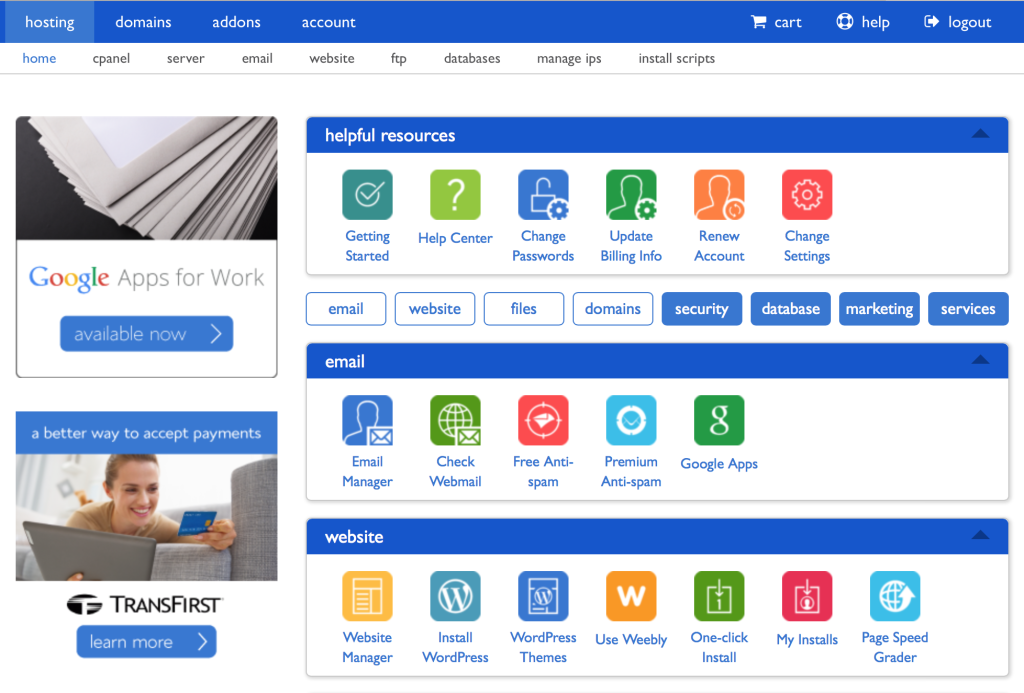 You will then be taken to another screen, where you should select “install” again and then choose the domain in which you would like to install wordpress (it will give you an option for a temporary site or your actual site – choose your actual site). A status bar will then appear with your progress and then once your installation is complete, your site login credentials will appear. You will want to make sure you save all of this information for your knowledge, because you will use it a lot.
Congrats!! You have just successfully installed wordpress on your site!
Install A Theme or Hire A Designer
Welcome to WordPress! Now that wordpress is installed, the next step is making your site pretty and unique to YOU. Creative Market is my favorite place to find WordPress themes. All you have to do is click the link here to Creative Market and look through their themes. They have a ton of really great options! Here are 12 WordPress Themes for Bloggers that I really like!
Or, if you would prefer, you can hire me to create a custom wordpress design for your blog. I would love to work with you on a design to make your site perfect for you. If all of this sounds scary, no worries, I will walk you through each step or even install WordPress for you after you get through the first two steps.
Create Content
The next and most important step of all is to create content! Get your site set up how you would like it with an about page, contact page and anything else. Then, start creating blog posts. Feeling overwhelmed still? Consider booking a consultation with me for more in depth tips on how to set up your actual site, just email me at [email protected] for prices and availability.